DIY Edible Outdoor Garland and Ornaments
- DIY
- GD Team
- Holiday DIY
Our designers like to make things for the holidays. That’s an understatement. Hand-crafted gifts are just another way for us to express creativity, after all! Are you looking to get resourceful with your gift-giving, but unsure where to start? Our Designer/Illustrator Megan Tracy has got you covered with this EASY embroidered ornament tutorial. Working with a few basic supplies, Megan created a little work of art that is sure to impress! Here are Megan’s own tips for an easy homemade gift that anyone would love…

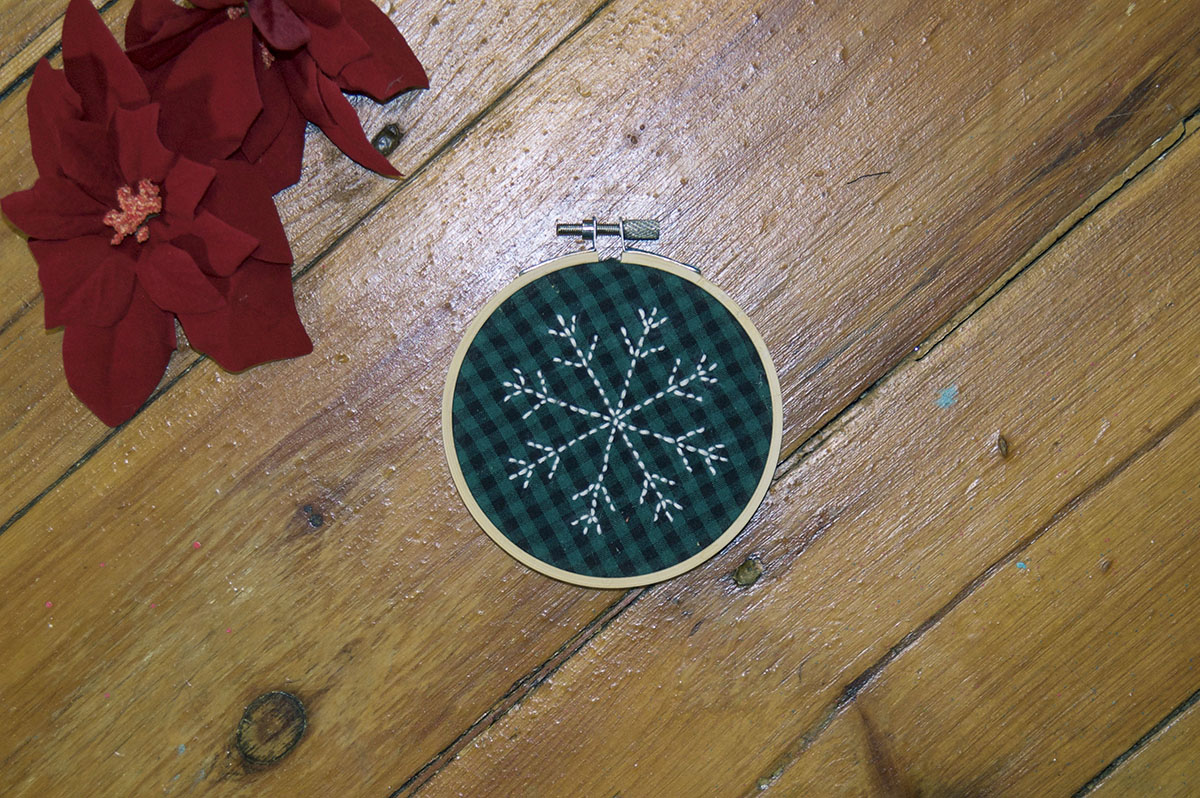
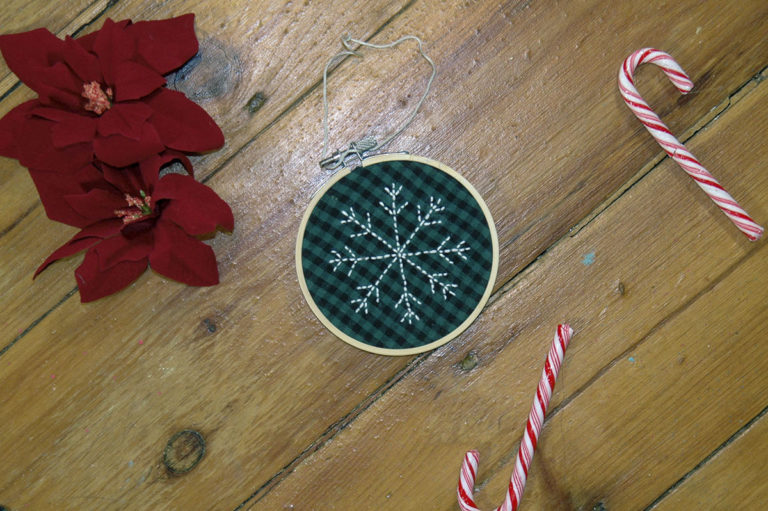
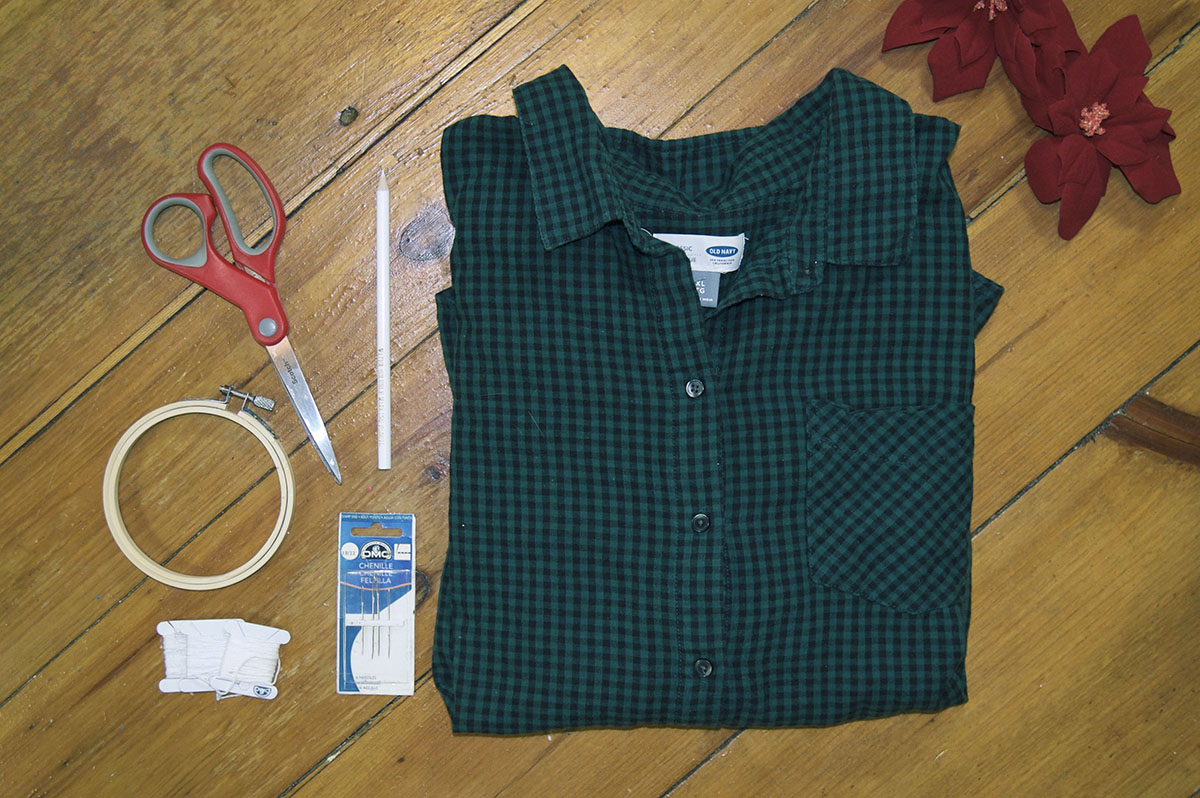
“Before jumping in, it’s important to figure out what exactly you’d like your project to be in the end to determine the hoop size you’ll need! To create my ornament, I chose a small 4 inch hoop. Here’s the full list of the materials I used:
Once you’ve decided what size hoop you’d like for your embroidery, next is deciding the design. In this tutorial, I’ve drawn out a simple snowflake design, but you can use any word, phrase or image you’d like for further customization.
For this project, I’ve created an embroidered holiday ornament…but it can also be displayed as wall hanging for anyone that loves all things hand-made.
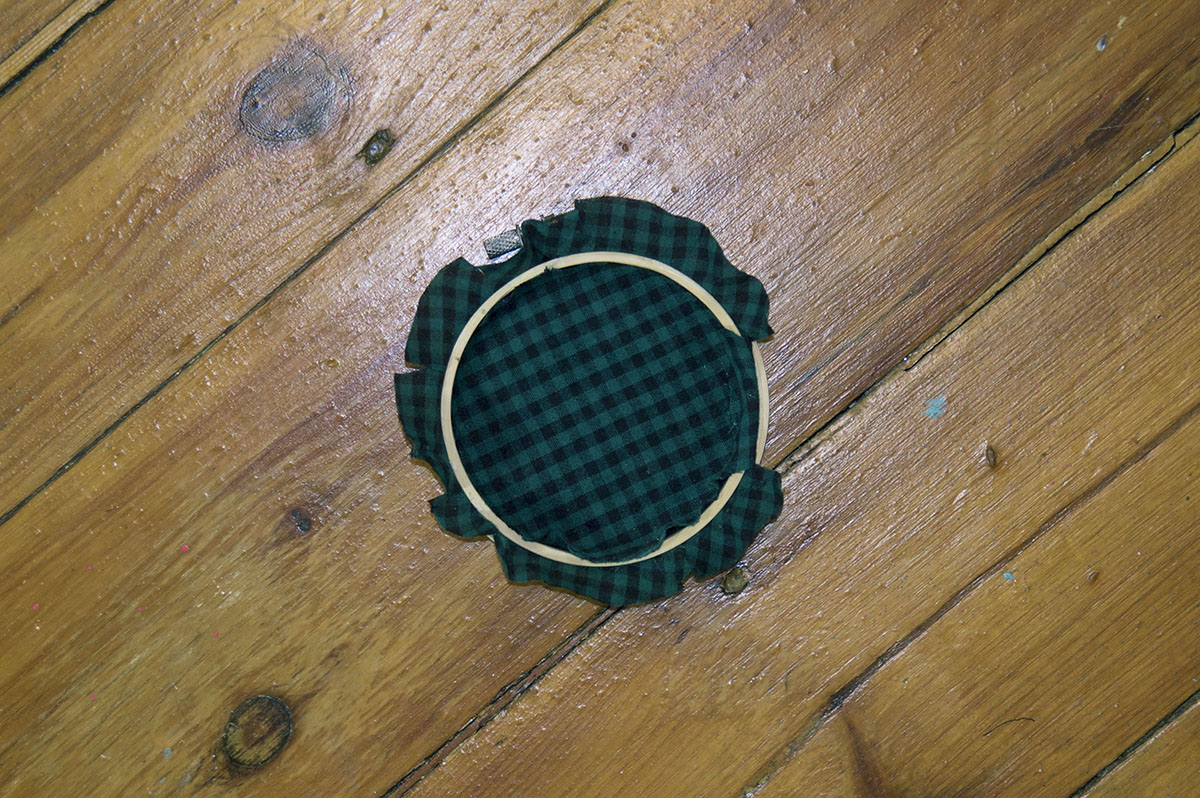
On a flat surface, lay out the fabric you’ll be using. For mine, I chose to use an old flannel to save me a trip to the fabric store. Using the smaller inner hoop from your embroidery hoop set, trace a circle onto your fabric, cut it out, and set it aside for the end of the project.
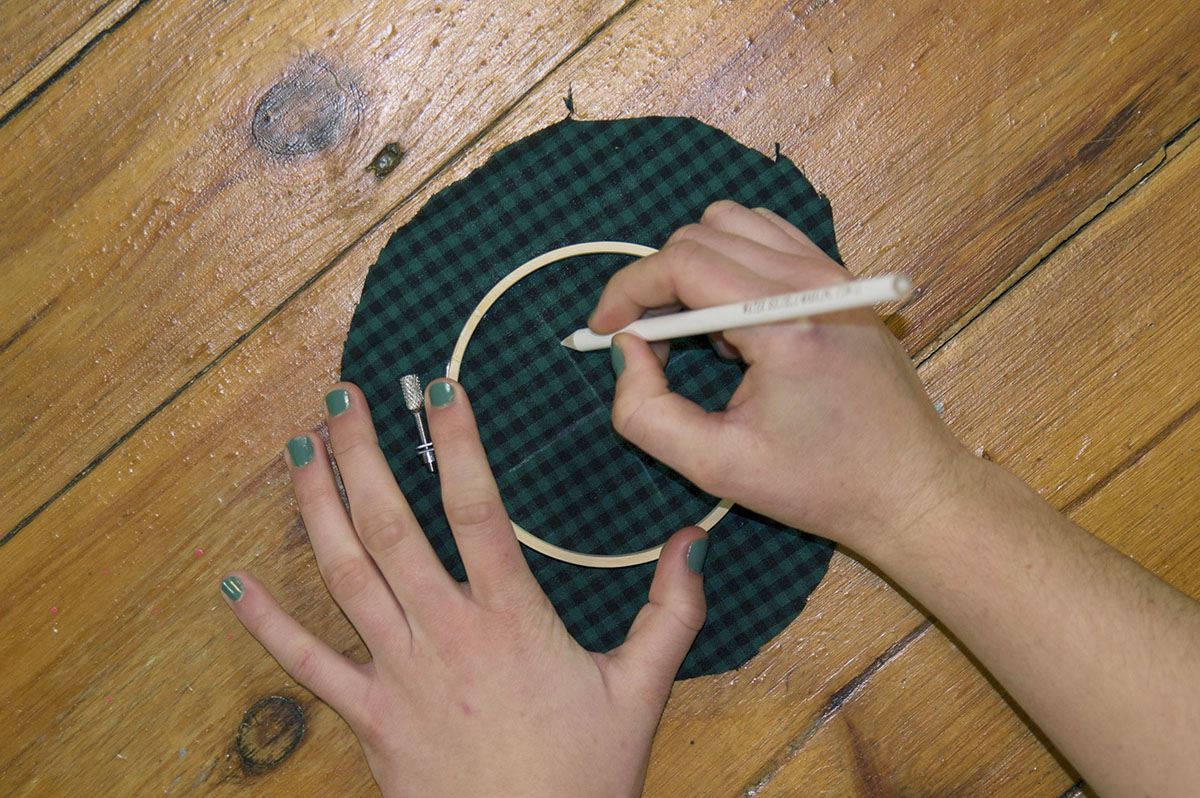
Now, with the rest of your fabric still laid out flat, place the larger ring of the embroidery hoop somewhere on the fabric where there is at least 1/2-3/4 inch of fabric around the outside of the hoop. Within the hoop, you can begin to draw out your design with a water soluble fabric pencil or marker.
Once you’ve finalized the design, you can put the embroidery hoops together around the fabric, making sure your design is centered, and tighten the screw. Then cut the fabric around the hoop, leaving 1/2 inch extra around the perimeter of the hoop.
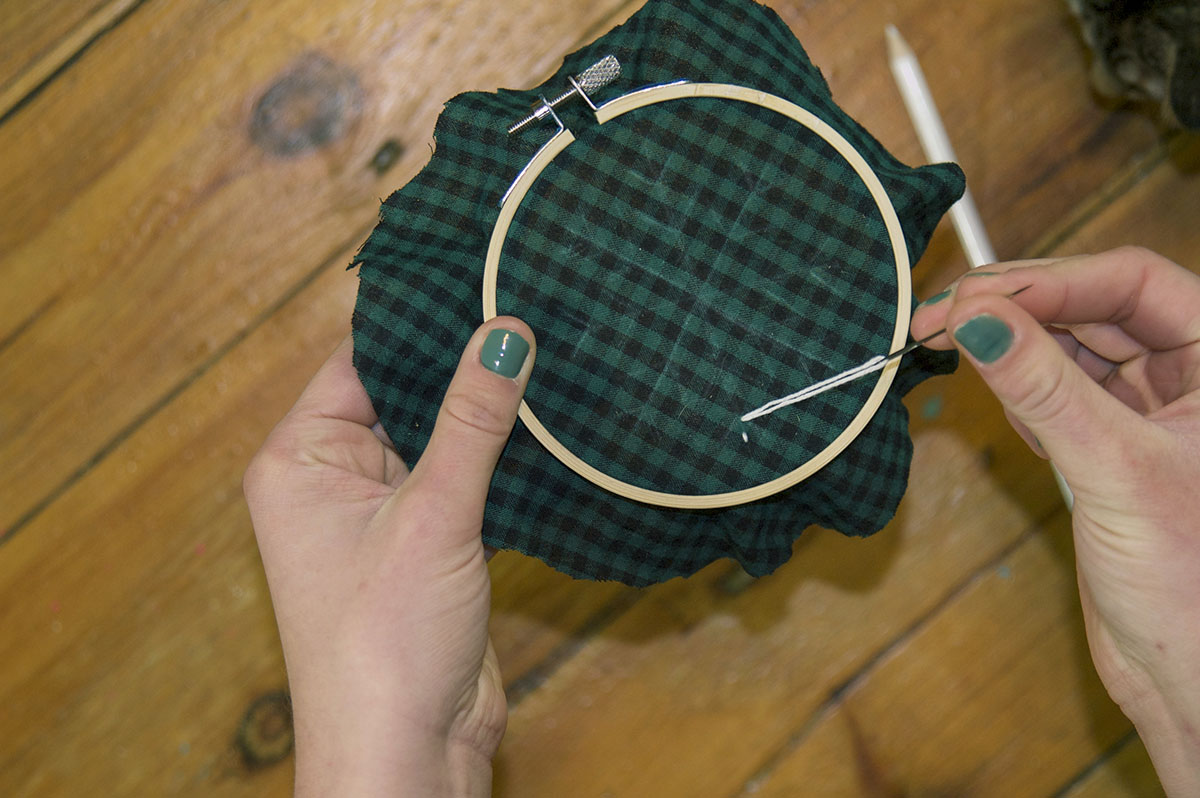
To start the actual embroidering, first chose a color for embroidery floss, loop it onto your needle, and tie a knot in the end of the string. For this design, I started with the main structure of the snow flake. Since this design is a simple outline, I chose to use a backstitch.
This stitch is fairly simple. First, at the beginning of any line on your design, bring the needle and thread up through the fabric from underneath, decide the length of stitch you want, then do one stitch forward. You’ll only do a forward stitch at the beginning of a new line. Then from underneath, space out the next stitch the same length as the first, pull the needle up through the fabric and then back down through the end of the first stitch. Repeat this backstitch until you come to the end of any line in your design. Then move onto the next line, and restart this process until you’ve completed the outline of your design.
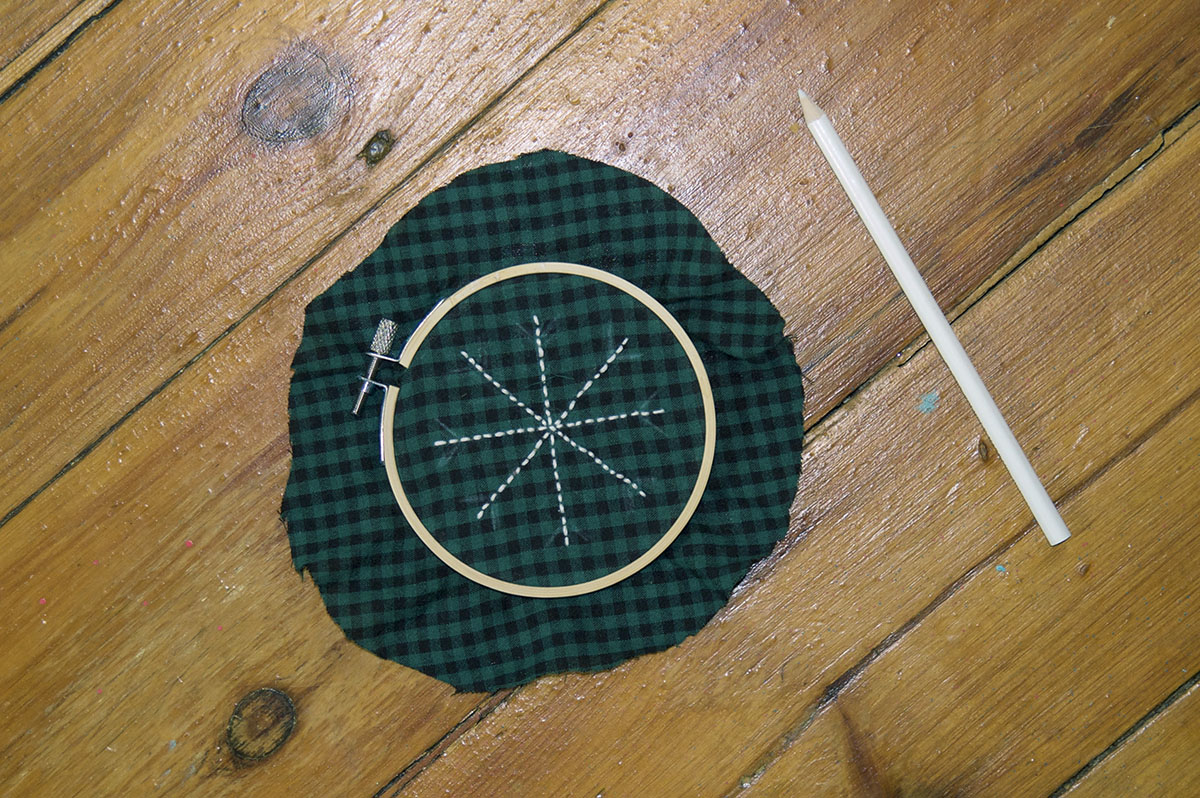
Once I got the basic shape of the snowflake completed, I made sure the details I wanted to add were still visible and retraced any lines that had faded with the water soluble pencil again. Once you’re happy and the design is visible, you can keep sewing. As you keep working, feel free to change embroidery floss colors at any point in your design, by tying off your string and starting the backstitch again. I stuck with white floss to keep it clean while contrasting with the dark green color of the flannel fabric. When you finish your design, you can make a knot at the end of your string on the back of the design and cut the tail of the string.
Making sure you have about 1/2 inch of fabric on the outside of the hoop (if not, trim it down), take your scissors and make incisions from the edge of the fabric towards the hoop every inch or so all the way around. Next, take the small circle of fabric that we cut in the beginning and place it, right side up, on the back in the middle of the smaller hoop. This will cover up the knotting and not-so-pretty back of the stitching.
Get your glue gun ready! With the embroidery hoop face down, grab one of the one inch section of the outer fabric that you’ve divided. Using the glue gun, put some glue (don’t go too crazy) on the very edge of the fabric and on the back of hoop itself, then fold the fabric over the edge of the hoop and smooth it down. Continue to do this until all of your one inch sections have been folded over the hoop and glued to the back. Then wah-lah! Your hoop is complete!
Before you dazzle the recipient with your creativity, be sure to finish it off with some flair. If you have some nice ribbon laying around or leftover embroidery floss, loop it around the metal screw of the hoop and then tie the ends together to create a loop so they can display it. Happy gift giving!”