The Importance of Creating Your “Just Right” Athletic Brand
- Academic
- Design
- Marketing
- School Branding

Uh-oh, less than a week before Christmas and you’ve run out of holiday cards and tags!? Trust us…by now, the store shelves are pretty picked over. With a few easy-to-use tools, you can create your own, and leave the long lines to the procrastinating shoppers. Working with a few basic art supplies, our Designer/Illustrator Tiffany McMeen created art to use on cards, tags and even wrapping paper. But you don’t have to be an accomplished artist to create something beautiful. Here are Tiffany’s own tips and tricks for gorgeous cards and easy gift-giving…
“For this demonstration, I created both bi-fold and flat cards. Before you start, determine what your final card size will be, keeping standard envelope sizes in mind, if needed. Here’s the list of materials I used to create these homemade cards:
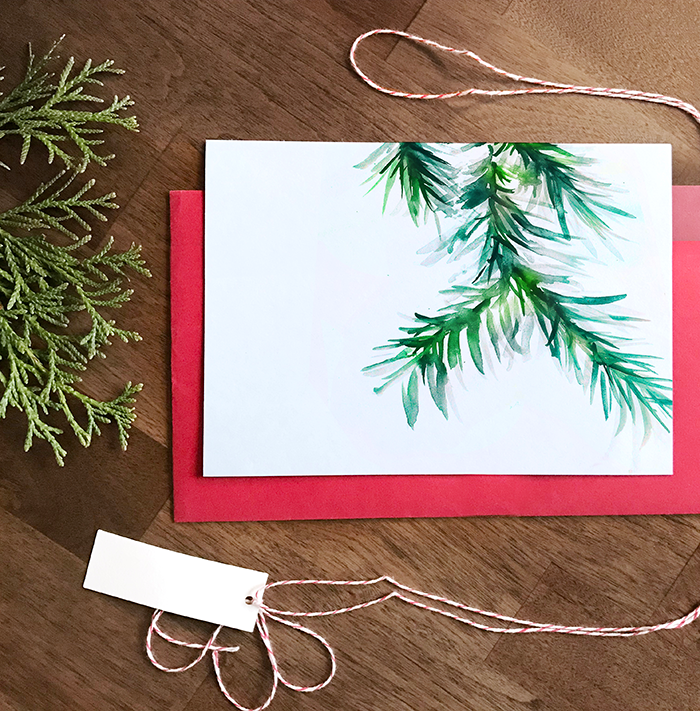
To create the watercolor artwork, it will be helpful if you first designate what you want to keep white, and make sure to keep that area clear of water and paint. It might also be helpful to stretch your watercolor paper onto a flat surface using kraft tape. This technique is used to help the paper dry flat. A good starting point—especially if you don’t paint often—is to begin by painting very lightly. Use a very watered down brush to sketch out what you are illustrating. Then you can go back and add more color and depth on top of your lighter sketches.
The brush strokes I applied are very simple. For the evergreen trees I used a few dabs of watered down green paint and sketched out the over all shape of the trees. Then, I went back with more paint and dabbed in the more saturated colors sporadically. Really, there isn’t much more to it than that, so don’t be afraid to give a try! The artwork will need to dry before we turn our pieces of art into homemade cards. So set those aside and pull out your calligraphy pen of choice.
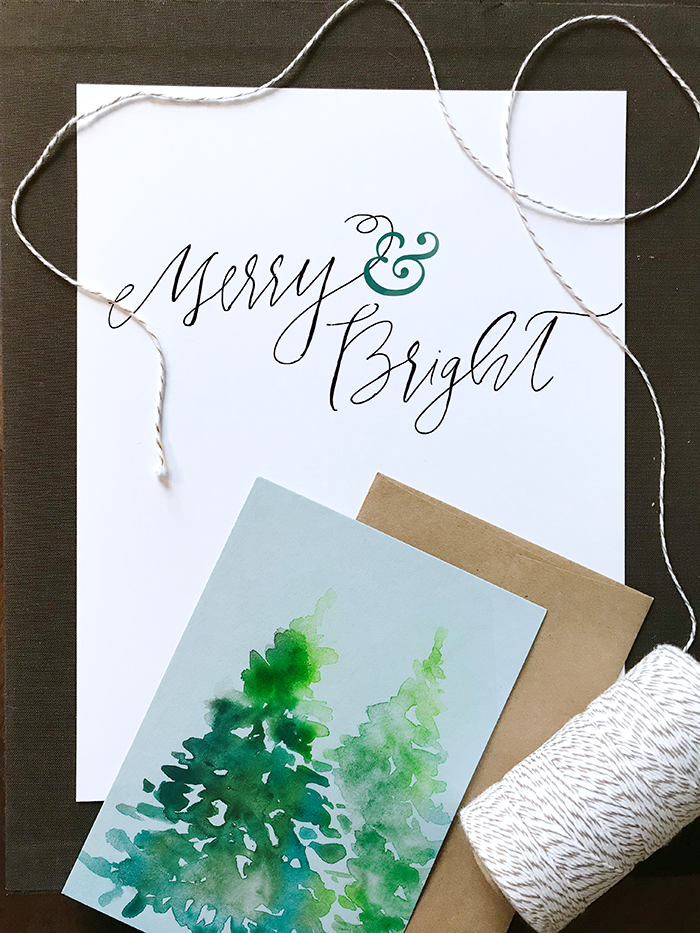
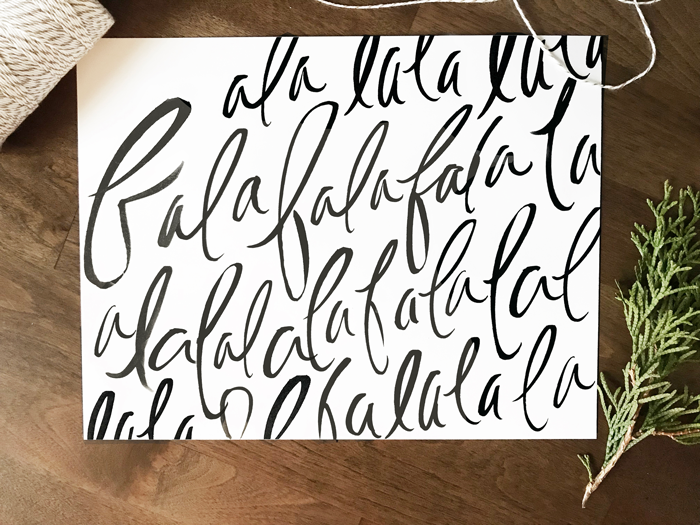
Calligraphy is a hobby of mine, and I enjoy incorporating hand-lettering into my design work. However, I am by no means a professional calligrapher. Do not get too bogged down with perfection in this step. There is something beautiful about imperfect personalized hand-lettering.
Sometimes, I find that I can get better results with a simple BIC pen than with a calligraphy pen, which is why I suggest you use whatever you are comfortable with for this project. I am also a huge fan of my Aqua Water Brush. I put ink directly into the pen, then by gently squeezing the body of the pen, the ink flows with the strokes.
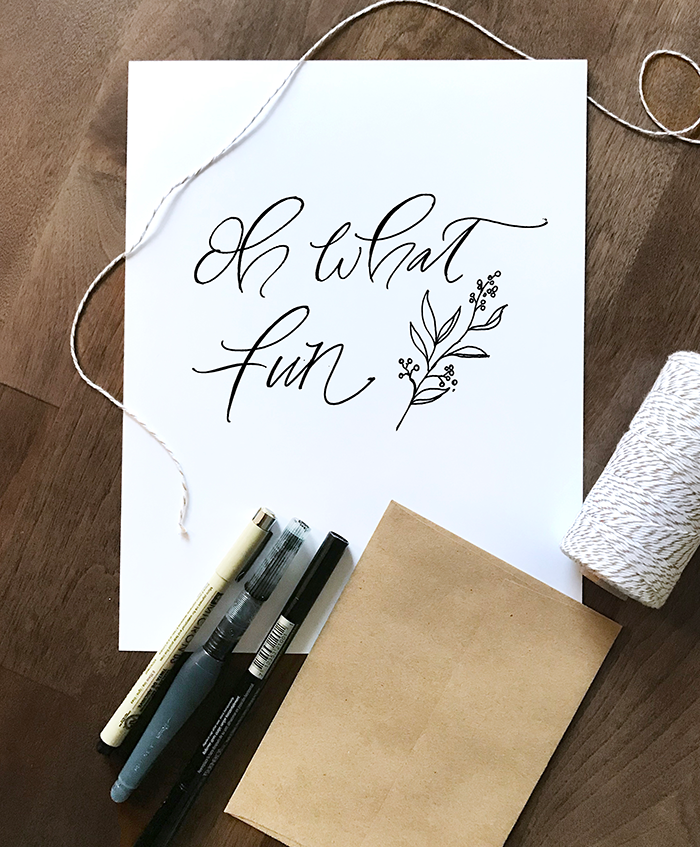
Choose your paper, preferably a medium to heavy stock so the ink doesn’t show through on the other side of the card. If you want to create a bi-fold card, plan to start your hand-lettering on the right hand side of your paper, keeping in mind that you will eventually put a fold crease down the middle of that sheet.
You may want to sketch out your saying with a pencil before introducing the ink. I suggest keeping the wording short. Consider using one word message or at the most 3-4 words. “Joy”, “Warm Wishes”, and “Oh, What Fun,” are great examples. Keeping the message short brings the focus to your hand-lettering, while also limiting the chances of making a mistake!
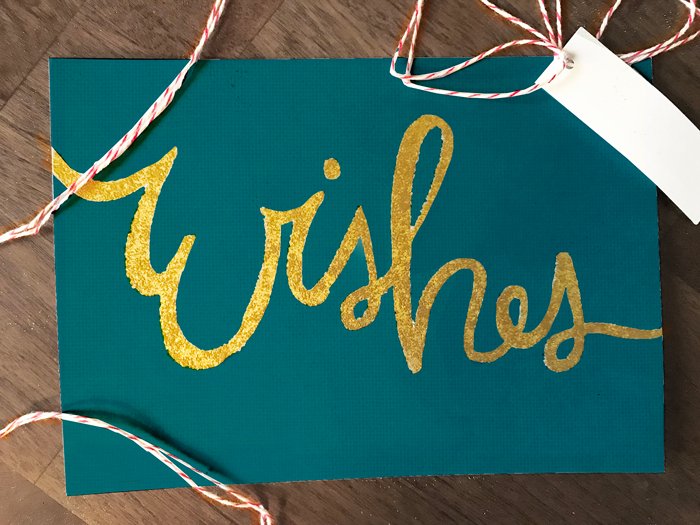
If you’d like, you can add some glitter and glam to your cards and tags. This will require some more advanced tools, but they are still easy to use. You will need a Versamarker, embossing powder and a heat gun to create this effect. I chose gold embossing powder for this card. In order to achieve visual contrast I also chose colored paper. I have found a dark jade or navy will pair well with our gold letters. The VersaMarker has a sticky clear ink. You will be able to see a slight color change when you are writing on paper, but for the most part the ink is meant to be invisible. Use the marker to draw or write your artwork. I suggest doing a few test runs with this marker first. You will find that it cannot produce a fine stroke like a calligraphy pen will, so I chose to write a one word message.
When you finish writing your message, pour the embossing powder over it. You might have to tilt the paper to get the powder to cover the entire artwork. Tap the paper against the table to get the loose powder off. Try using a clean, dry brush to wipe away any residual powder still left on the paper. Next, fire up your heat gun. (A blow dryer won’t work, trust me!) It won’t take long before you start to see the embossing powder melt into liquid gold!
Now you’re in business! You have custom watercolor art, personalized hand lettering, and a custom embossed card. Now, simply cut down your cards to your desired size. If you are planning on doing a bi-fold card, use a ruler and a bone folder tool to create your fold crease. Don’t forget to sign your name! You’re going to want all your friends and family to know who made this stunning masterpiece!”